Pool Construction Services in Jacksonville & St. Augustine, FL
Pregrade and Irrigation Capping
Once your construction plans are completed and the permit with the county has been approved, we can begin construction. The Coastal Luxury Outdoors team will come out and remove any grass from the pool and deck area and level the ground. We call this the pre-grade. This is the first-time heavy equipment will be used at your home. If you have an existing fence we will need to have panels removed in order to get our equipment into the back yard.
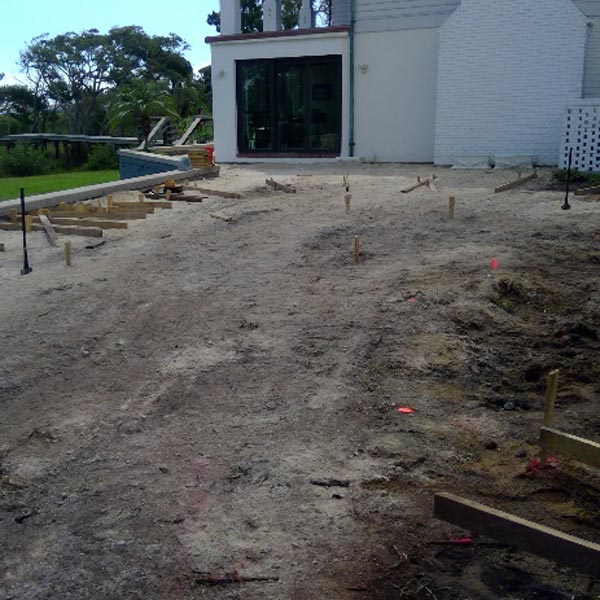
Forming
Once the area is graded, the crew will use stakes and lumber to “form” the shape of your new pool. We will have one of our field superintendents verify all measurements prior to moving forward with construction. Any changes to the shape or location of the pool after this point will delay the process and create additional costs so we make sure to measure twice and dig once!
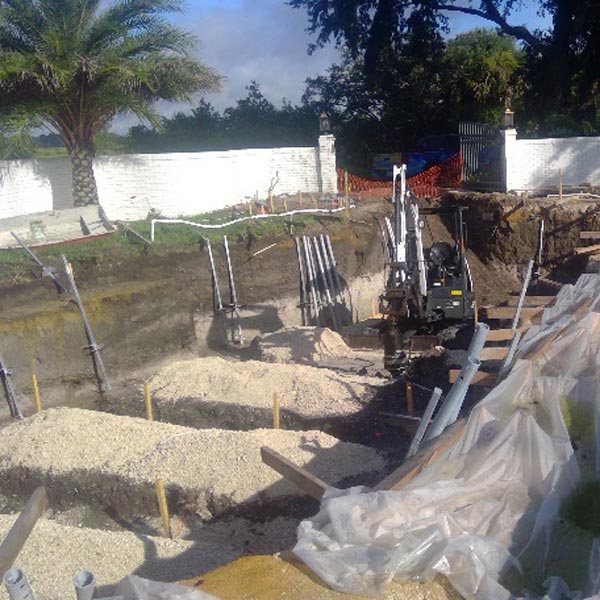
Excavation
This is a messy, dirty process – but very exciting! The Coastal Luxury Outdoors crew carefully digs, forms, and hand-trims your pool in precise accordance with every detail of your design specification. You’ll soon be able to “see” your pool – in the dirt! The process usually takes a day but can be longer depending on the condition of your soil and, of course, the weather.
When we start digging, we’ll dig up a lot of dirt! The majority of the dirt will be removed the same day as the dig. Don’t be concerned if some dirt remains – we’ll be using that in the construction process. If for some reason, you want to keep a portion of the dirt removed, we need to know how much. Remember: we do not landscape for you!
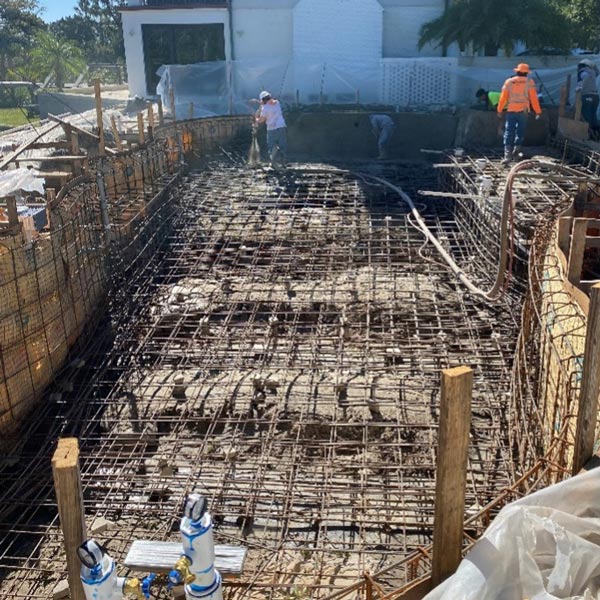
Steel
Once the digging is completed, another crew will be out to form a rigid, contoured grid of reinforcing steel rebar to create the “backbone” of your swimming pool. At this point, the County Inspector will do what is called a “Steel Inspection.” No work can proceed beyond this point until we have permission from the county.
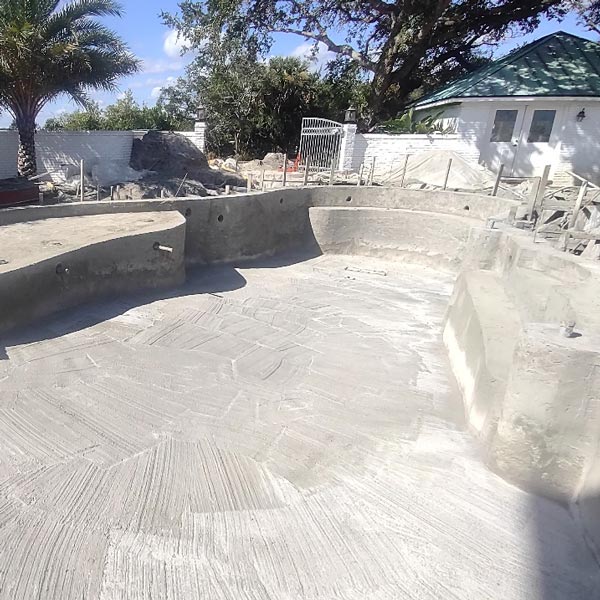
Shooting the Shell
Once the county steel inspection has been approved, we will release the concrete company to install the shell of your pool with a form of concrete called gunite. Gunite is a mixture of cement and water, much like the concrete you are used to, but it is much easier to shape as it comes out of the truck under pressure and is sprayed on rather than poured. Gunite is not mixed before arriving at job, so the crew will need access to water at your home. Gunite is actually dry concrete mixed with water as it leaves the truck through hoses so that the crew can adjust how much water is needed for a proper mixture. The crew will shoot the gunite around your pool’s steel reinforcement grid. Now is the time that your steps, swim-out and/or benches will be installed as well.
The pool shell will now take some time to fully harden and cure. Within a few days of the shell being shot, the form boards will be stripped, and the sump pump or well-point pump will be turned off. Don’t worry if water comes into your pool through our relief hole in the bottom, this is the natural groundwater level and is normal.
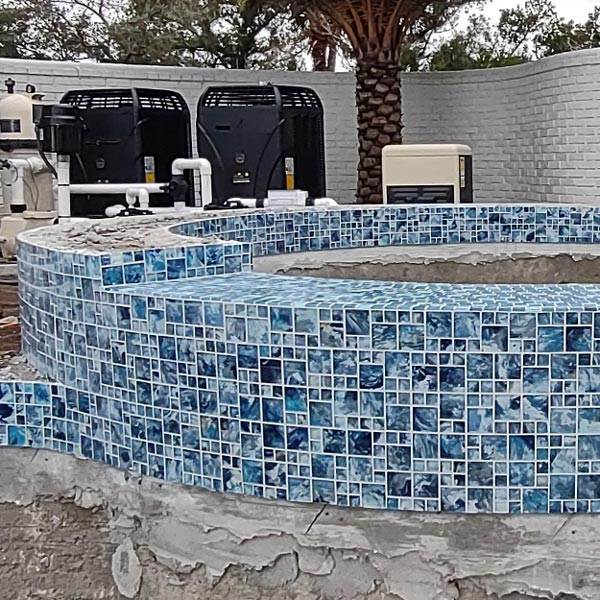
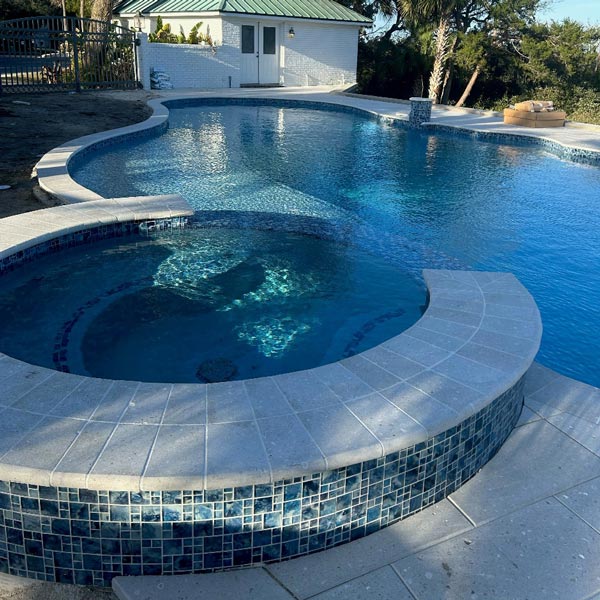
Tile and Plumbing
During tile installation, we’ll be squaring off and leveling the walls and setting the waterline tile that you selected near the top of the pool beam. This creates the water line of the pool. It will be hand-laid and carefully grouted around this waterline by our skilled craftsmen.
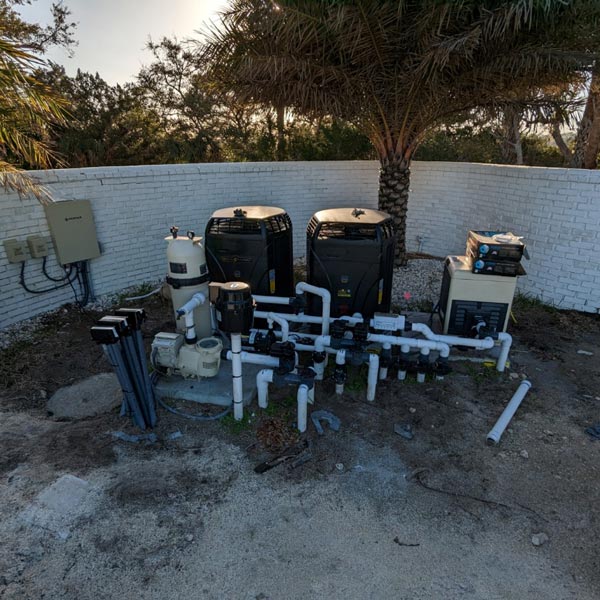
At this point, your pool is also ready to be plumbed. Please make sure, if you have not done so yet, that all sprinkler lines are marked or capped. We use Schedule 40 PVC pipe designed to prevent leaks and deterioration. All the connections are solidly bonded, and the entire plumbing system is hydrostatically pressure tested. During the plumbing installation, we will also run the copper grounding wire from the pool shell to the pool equipment area. This will be used later by our electrician to help ground all of the pool components.
The grounding inspection must be approved before we can begin the next phase.
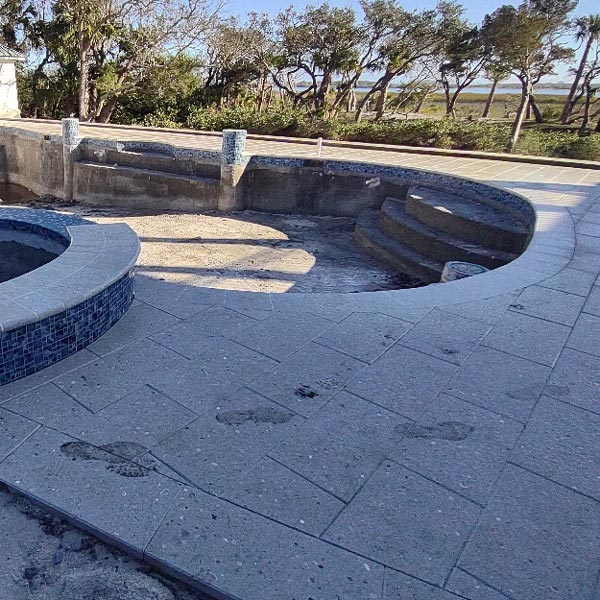
Decking Install
Electrical Hookup and Final Grounding
At this point in your project, our licensed electrical contractor will carefully make all the electrical connections for your pool lights, pump, any other equipment, and set up a new electrical subpanel outside near the pool equipment. We will attach the previously run copper wire from the pool equipment area to our new subpanel to complete the grounding of the pool system.
Once the wiring is completed, please DO NOT attempt to turn anything on. We will do the initial start-up of the pool equipment once water is in the pool.

Interior Finish
During this week-long process, an experienced surfacing crew will apply the pool interior surface you’ve selected. First, a prep crew will come in and clean the shell of the pool and install the color-matched fittings on any pipes entering the pool shell. We will then apply a layer of bond coat. Think of it as the primer coat before you paint a wall.
Once the bond coat layer is dry, craftsmen will come in and hand apply your finish to the pool. This application is much more of an art form than a science. Since the finish is troweled and applied by hand, please keep in mind that no two interior finish applications are the same. Think of your interior finish more as paint on a canvas rather than a printed graphic design.
Once the finish is installed, a mild acid wash will be performed the following day. This wash will remove any excess plaster and film on top of the finish, then we will begin filling the pool! The fill process generally takes 1-2 days.